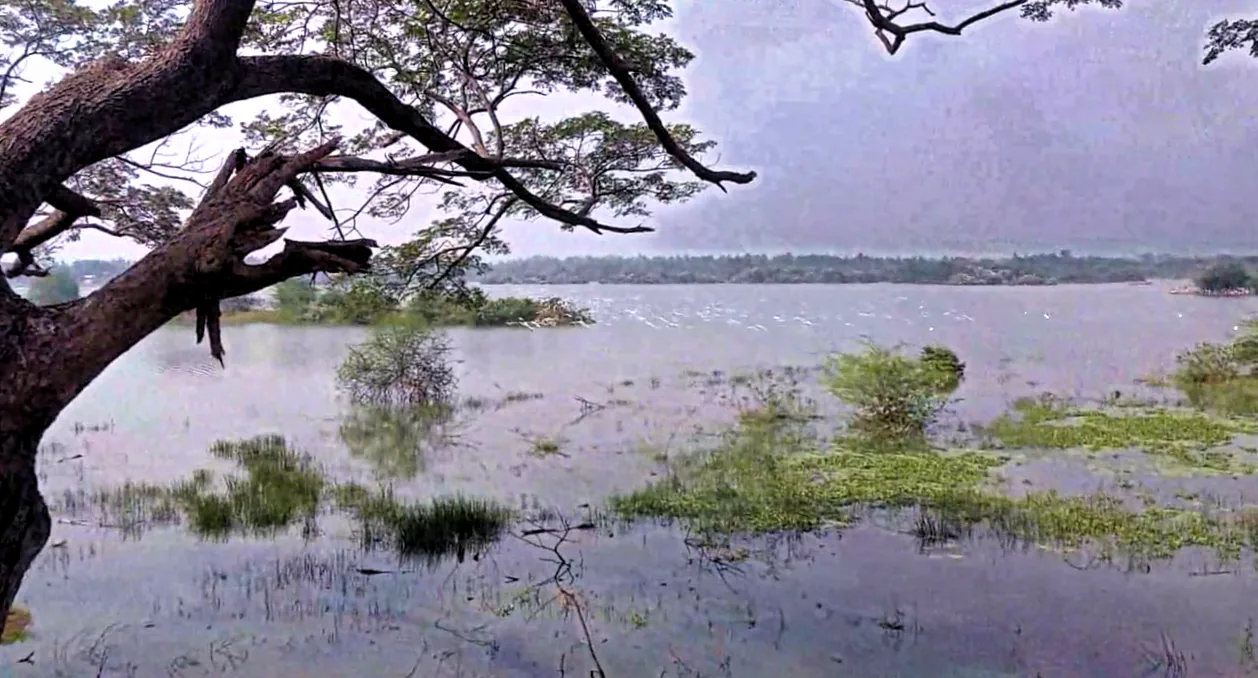
Pick a landscape photo with some sky in it, the flatter and hazier the better. Every edit you make stays live, so you can go back and change any of them later.
Steps
Click New Project on the start screen. The empty viewport shows a card of ways to start. Drag a photo from your desktop onto the viewport, or click Start from... under 2D and choose Image file.... Your photo opens in the viewport.
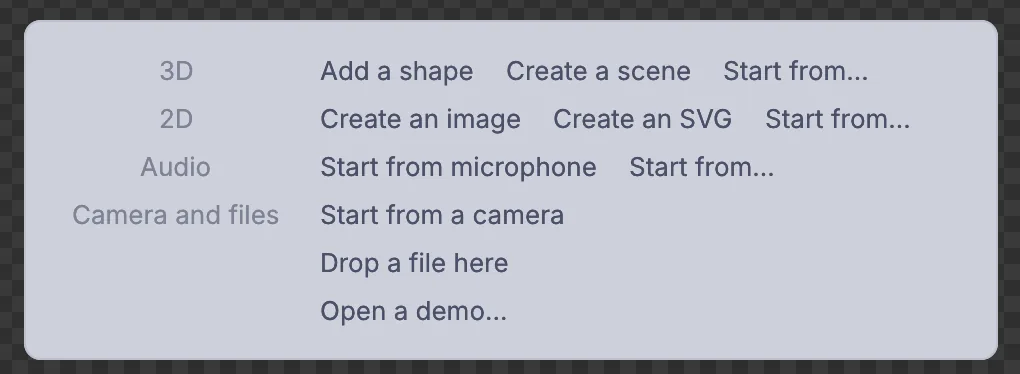
The start card on an empty viewport. Start from... under 2D opens an image file. Brighten it. Choose Edit > Adjust > Tone > Develop from the viewport's toolbar. A card of settings appears over the picture. Drag Exposure up a little, set Contrast to about
20and lift Shadows until the dark parts open up. Every setting is also in the Properties panel on the right, where you find Vibrance and Dehaze: raise both to clear a hazy day.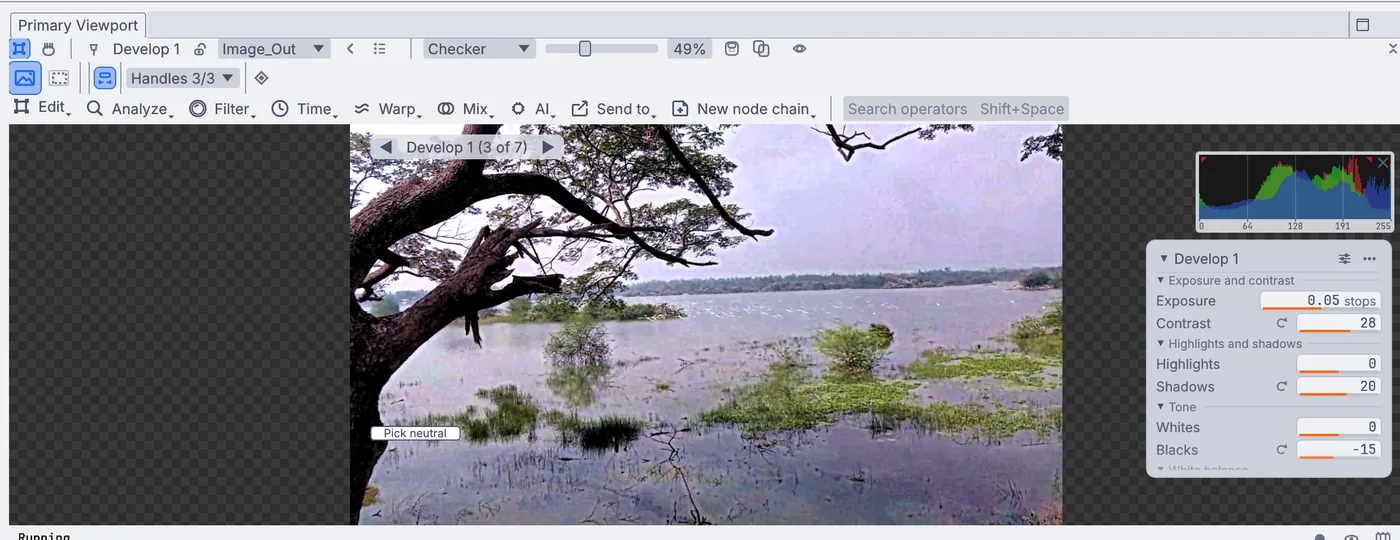
Develop's card on the photo: Exposure, Contrast, Highlights, Shadows and the rest. Level the horizon. Choose Edit > Framing > Rotate and flip > Straighten and drag a line along the horizon. The photo turns to match and is cropped so no empty corners show. Fine-tune Degrees on the card.
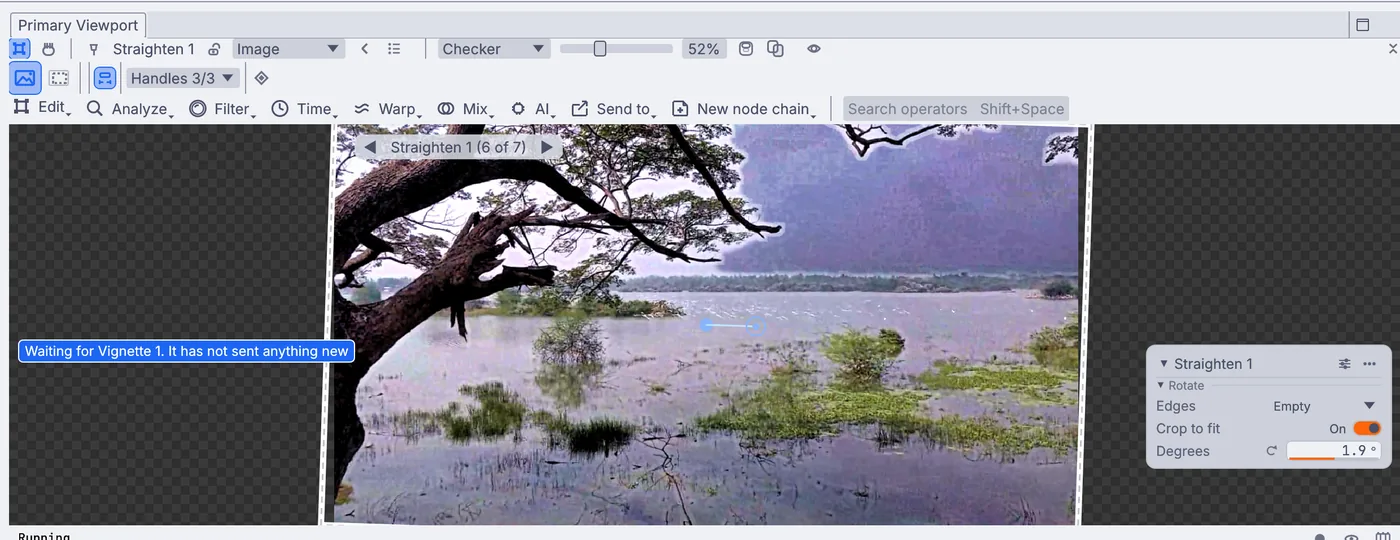
Straighten turned the shoreline level and cropped the corners away. Switch to Selection. At the top of the viewport, right above the Edit menu, click the dotted rectangle beside the picture icon. The viewport is now in Selection, so your next edits can stay inside a selection, and the Edit menu gains the Retouch and Layer menus.
Select the sky. Click the next button, the dotted rectangle with a small arrow, to open the Select menu, and choose AI > Sky. The first time, Kinematic downloads what it needs and shows the download. Then marching ants go around the sky.
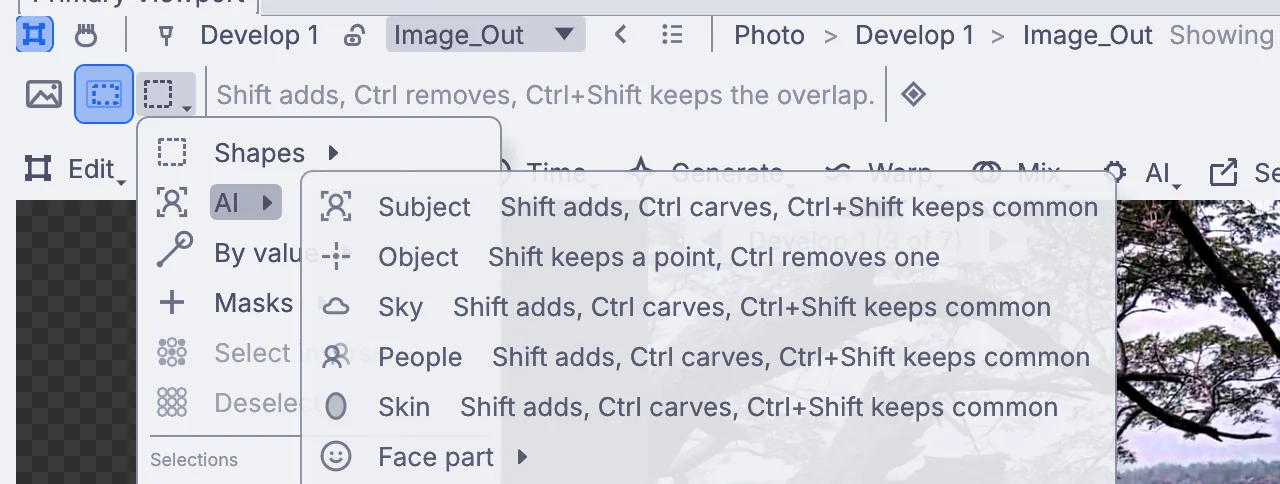
The Select menu: AI holds Subject, Object, Sky, People, Skin and Face part. Deepen the sky. Choose Edit > Adjust > Tone > Develop again. This second Develop changes only the sky: pull Highlights down to bring back the clouds and lower Exposure a touch. Nudge Temperature in the Properties panel for a cooler or warmer sky.
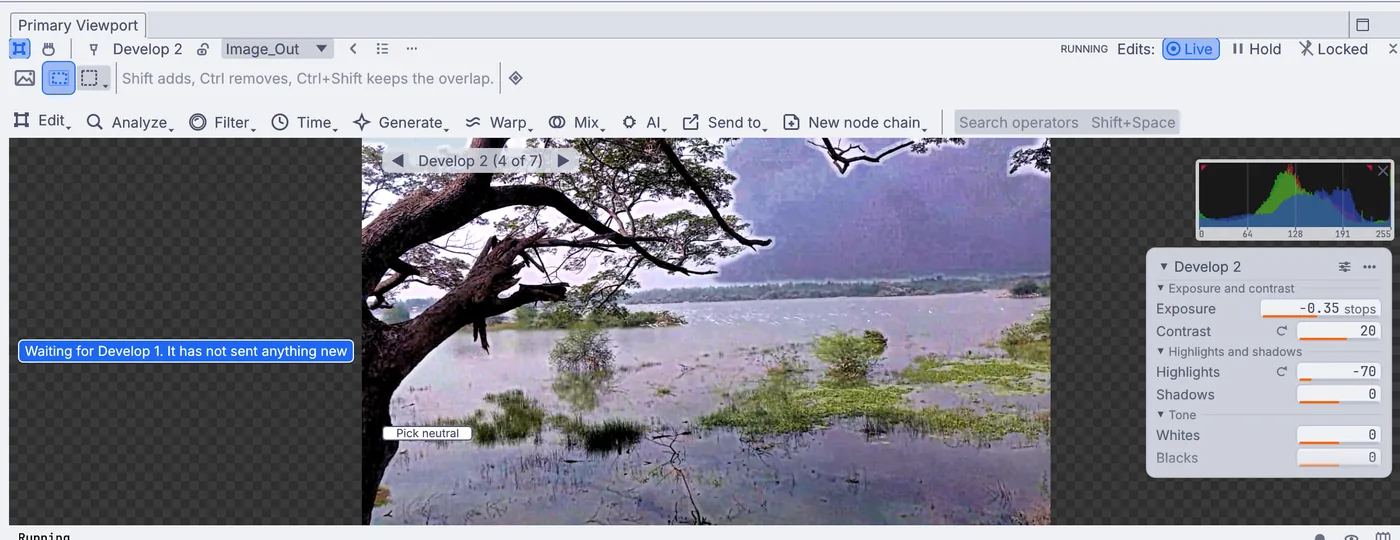
The second Develop works inside the sky selection only. Darken the corners. Open the Select menu again and choose Deselect, so the next edit changes the whole photo. Then choose Filter > Light and lens > Vignette. Drag its rings on the picture to size it, and set Strength in the Properties panel.
Crop if you like. Choose Edit > Framing > Crop and size > Crop. Pick a shape under Aspect, such as 3:2 or 4:5, and drag the corners of the box.
See every edit. Open Window > Panels > Stack. Every edit you made is listed there in order and stays open to change: click any one to change its settings, and press its Compare button to wipe between before and after.
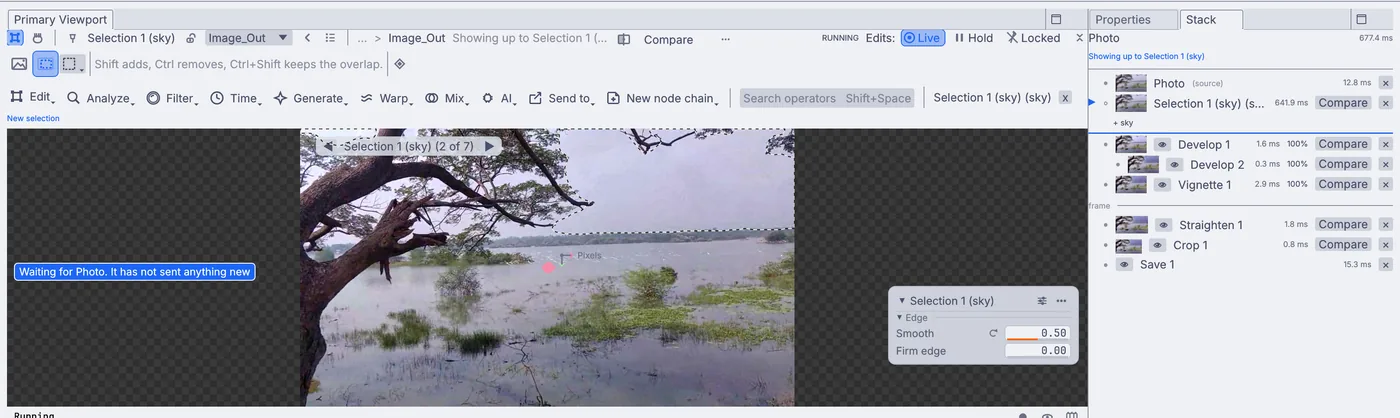
The Stack beside the viewport: the photo, Selection 1 (sky), two Develops, the vignette, Straighten and the crop. Save it. Choose Edit > Layer > Save frame.... This adds a save step that writes your photo as a picture file named after the original, such as
lake_edit.png. Set where it goes with File path on its card.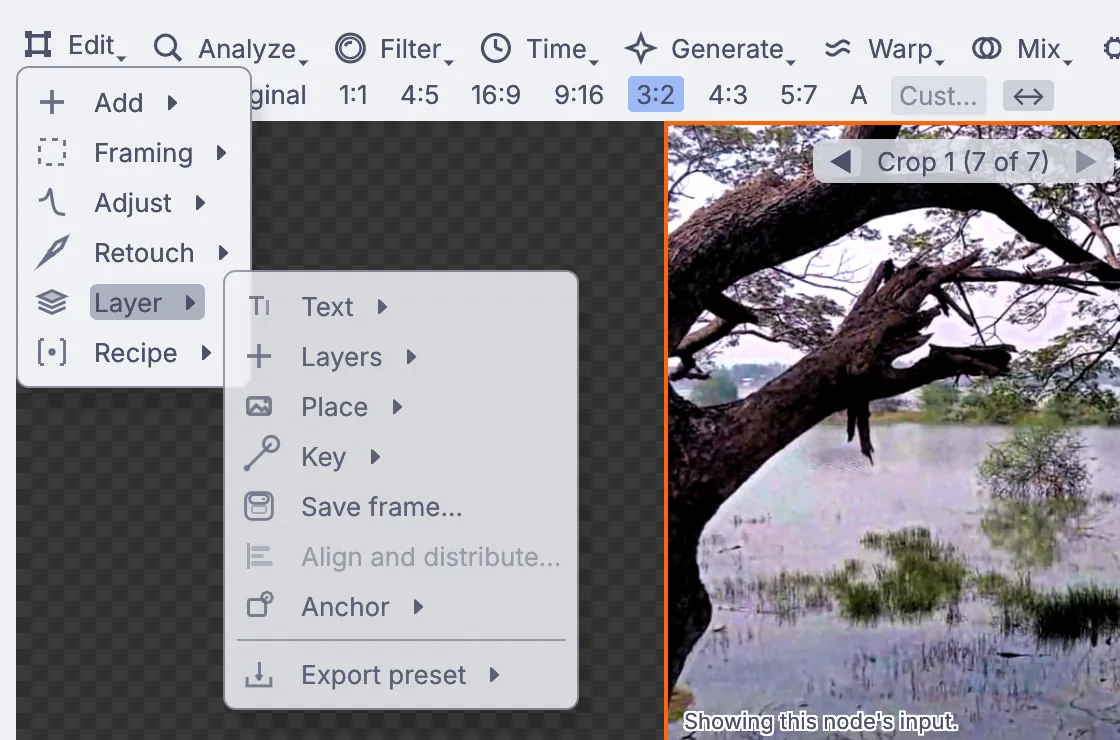
Edit > Layer, with Save frame... in the middle.
On the canvas
Your photo is an InputImageFile node, and each edit added one node after it: ImageDevelop for each Develop, ImageRotate for Straighten, then ImageVignette, ImageCrop and OutputImageFile for the save. The sky selection is two nodes, LocalAIImageToSceneParsing finding the sky and ImageMaskRefine holding the selection.
Make it yours
- Choose AI > Subject instead of Sky, then Select inverse, and darken everything around your subject.
- Try Edit > Adjust > Looks > Split toning for cool shadows and warm highlights.
- Keep your edits with Edit > Recipe > Save as Recipe... and put them on your next photo from the same menu.
- Edit > Layer > Export preset adds a web-size or print copy beside your Save.
If it goes wrong
- The Select menu is missing: click the dotted rectangle above the viewport's Edit menu to switch to Selection first.
- Sky finds nothing on your photo: draw the selection yourself from Select > Shapes.