Kinematic 0.5.0 is out. Modeling and sculpting in the viewport, a timeline on every graph, photo and sound editing. What's new
Kinematic / Tour

A tour of the app.

Ten stops through the Kinematic window. What each part is for, what you do there, and the keys that get you there.

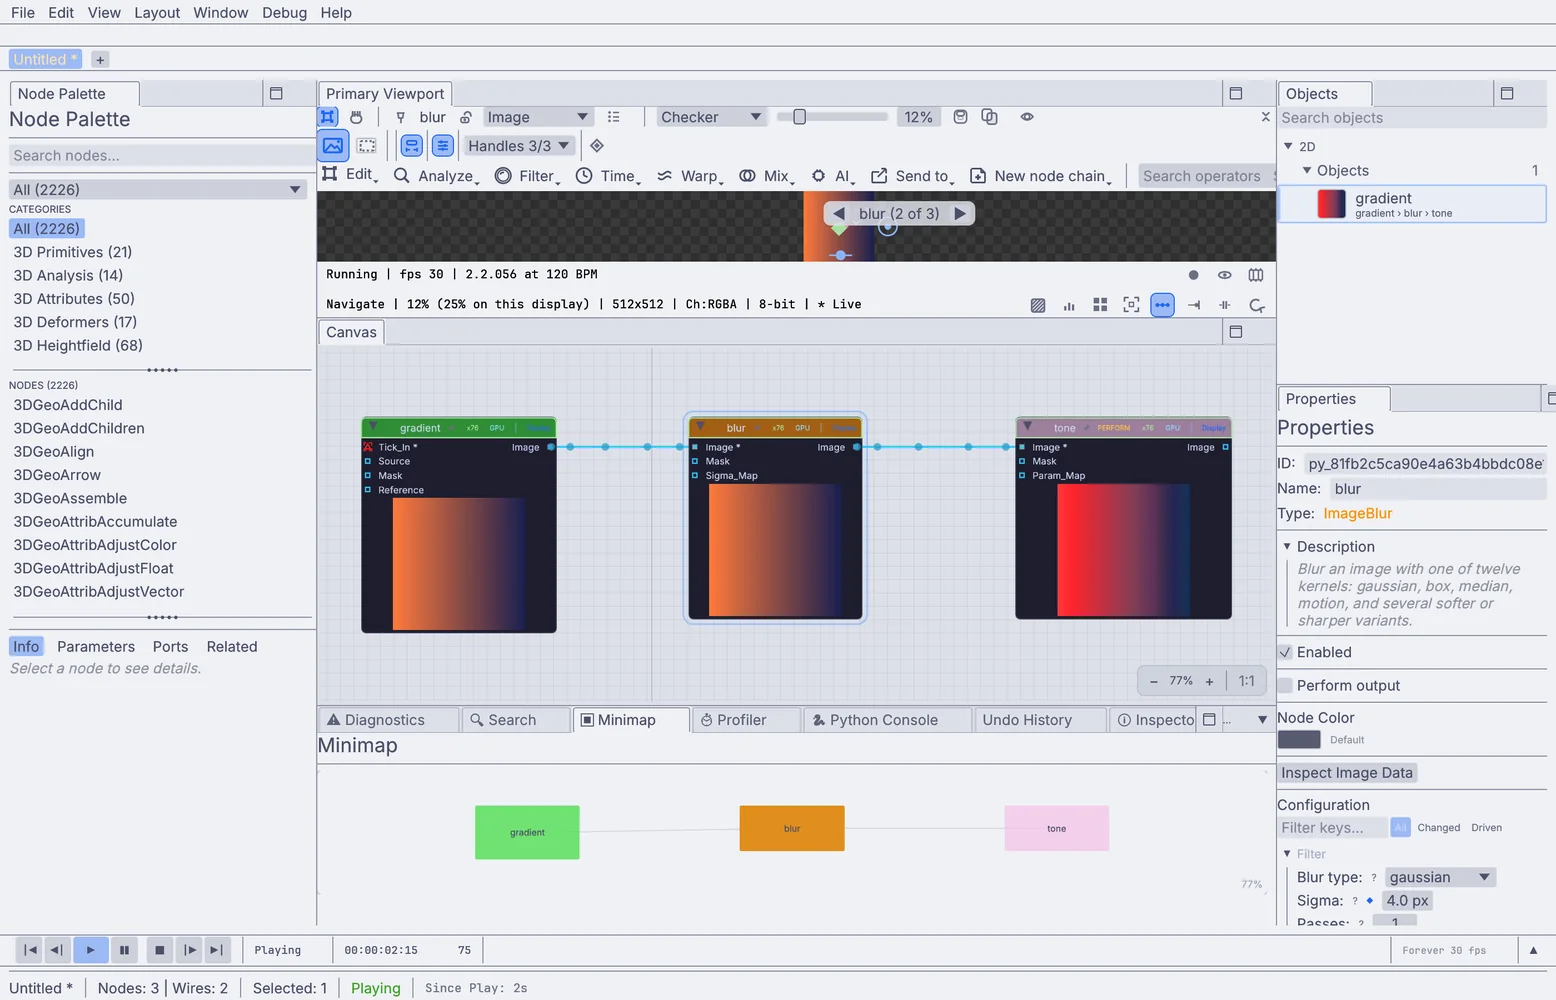
The Kinematic window: Node Palette, the viewport above the canvas, Objects and Properties, the timeline bar1The viewport2The canvas4The timeline bar5Properties6Panels: drag any tab7Python, in the bottom panel
The whole window. Numbers mark the stops; click one to jump there.
Two ways to work

Start from the picture, or from the graph.

One app, one file, one piece of work. Start in the view that feels like home and switch whenever you like.

Viewport first

Work on the thing itself.

Pick faces and pull them, crop the photo, pose the character. Each step lands in the graph as a node, so the graph fills in as you go.

For people coming from Blender and Maya.

Ctrl+Buntil the viewport has the middle to itself
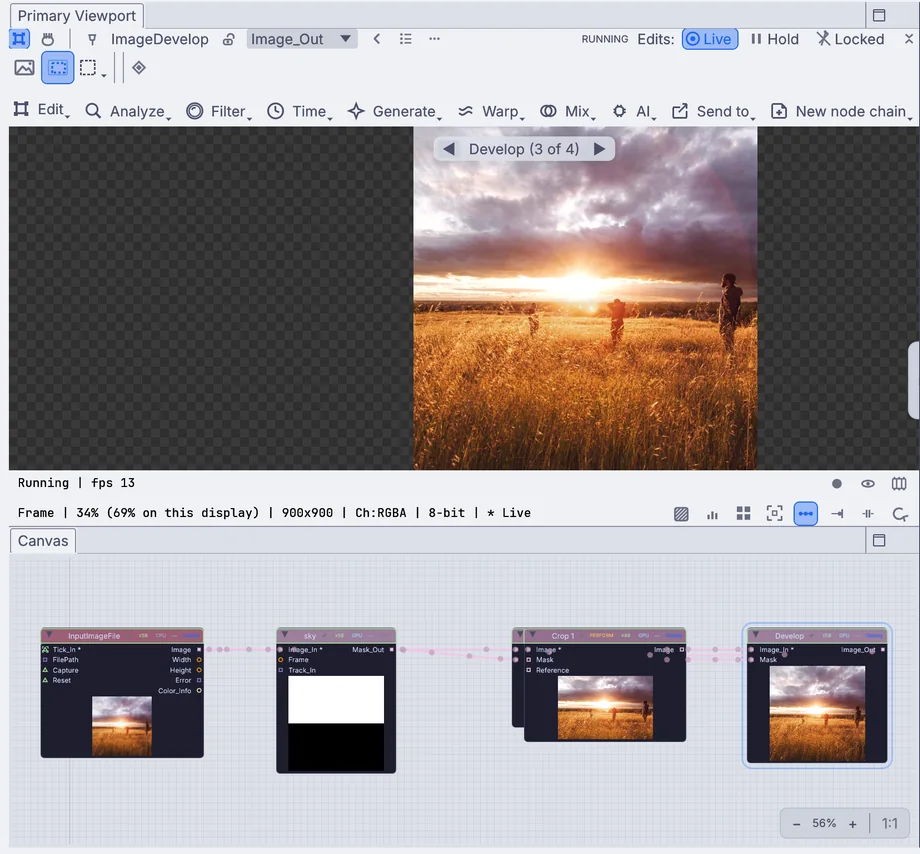
The viewport showing a photo at its Develop step, and the canvas below it with the same four nodes ViewportCanvas
One photo, four steps. The viewport shows the Develop step; the canvas shows the same four nodes.
Canvas first

See every step as a node.

Wire nodes by hand, branch one picture into several looks, and step inside a Component to see its own graph. Click any node and the viewport above shows what it makes.

For people coming from Houdini and TouchDesigner.

Ctrl+Buntil the canvas has the middle to itself
Same work, two views.Every edit in the viewport is a node on the canvas, in the same order the Stack lists it.
One selection.Pick something in the view and it is picked on the canvas too.
Ctrl+BSplit, viewport only, canvas only. Nothing closes; the next press brings it back.
01Middle, top

The viewport

Look at what any node makes, and work on it right there.

Select a node and the viewport shows what it makes: a shape, a picture or a sound. Pin it to keep that view while you click around.

Pick points, edges or faces and cut, bevel or sculpt them. Crop a photo, trim a sound, pose a character by its controls. Every tool writes an ordinary node into the graph.

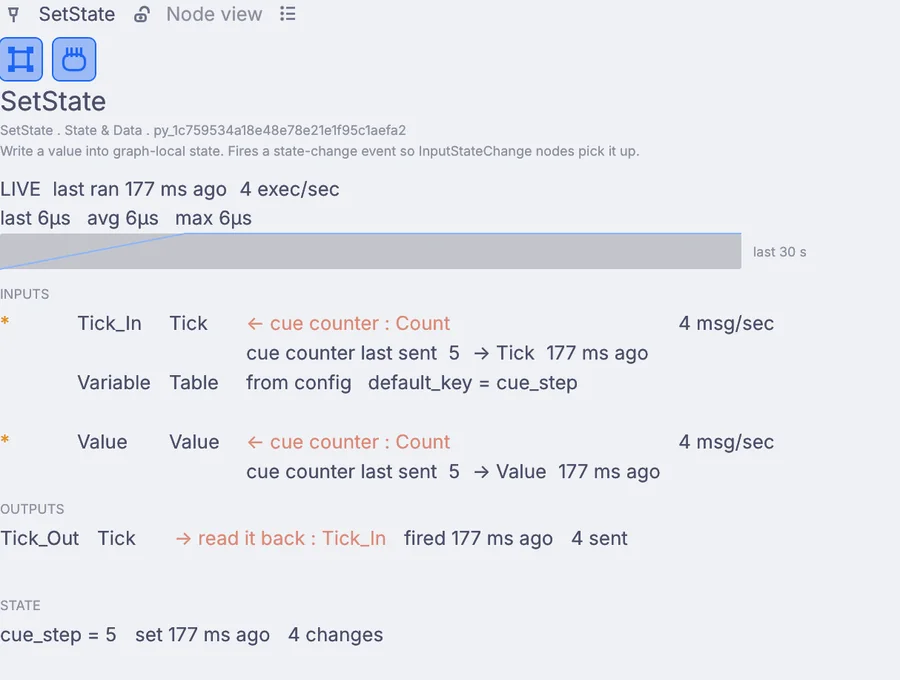
A node with nothing to look at, like a Timer or a Counter, gets a node view: what came in, what went out, and how long ago.
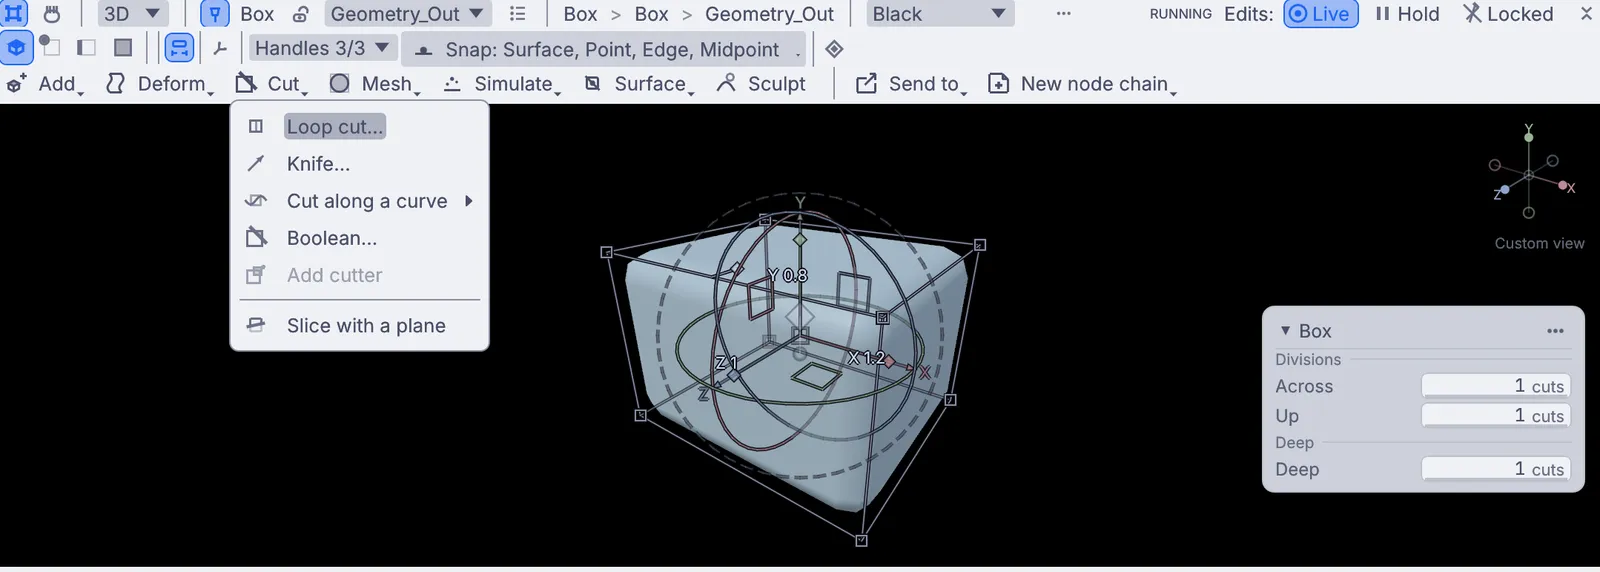
The viewport on a box with the Cut menu open, its handles drawn on the shape
A box in the viewport: the Cut menu open, handles on the shape, its settings card beside it.
The node view of a running SetState: inputs, outputs and state
Node view: a SetState, what it read, and the value it wrote.
02Middle, under the viewport

The canvas

The graph itself. Every node and every wire, in plain view.

Drag from an output to an input to wire two nodes. Drop a wire on empty canvas and pick from the nodes that fit.

Press Space and type a few letters to add a node at the cursor. Double-click a Component to step inside it, and use the trail at the top to come back out.

Press E on a node to open its own editor: keyframes, piano roll, video timeline, projection mapper, shaders and more.

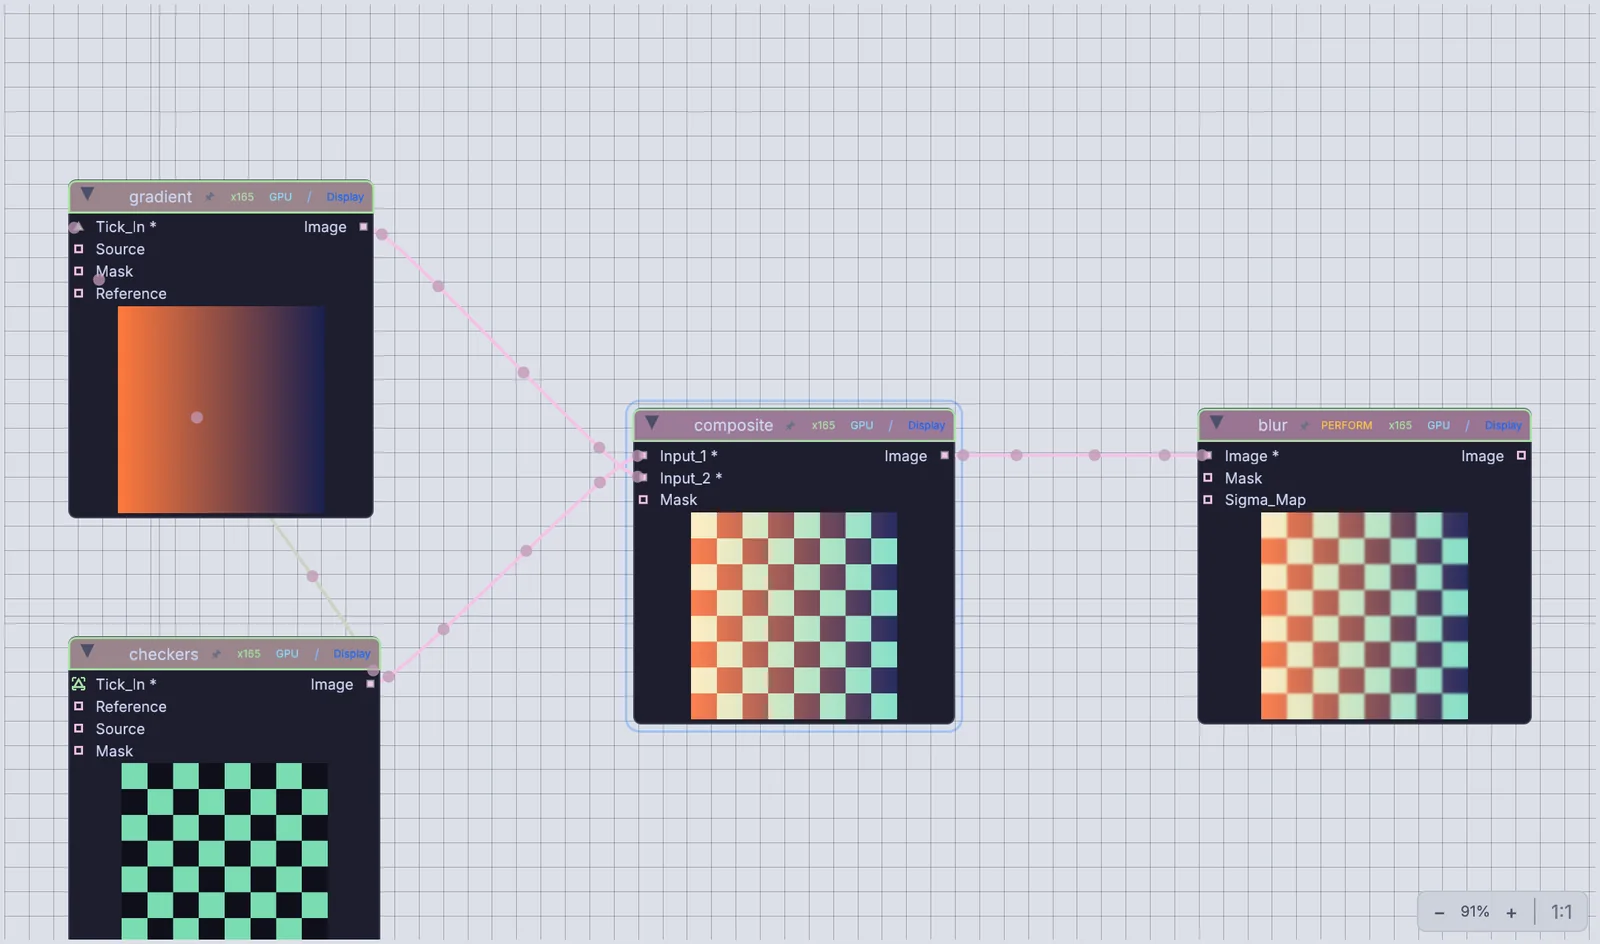
The canvas: gradient and checkers wired into a composite, then a blur
Gradient and checkers into a composite, then a blur. Each node shows its picture as it runs.
03Right, a tab beside Properties

The Stack

Every edit as a list, from the source down to Save.

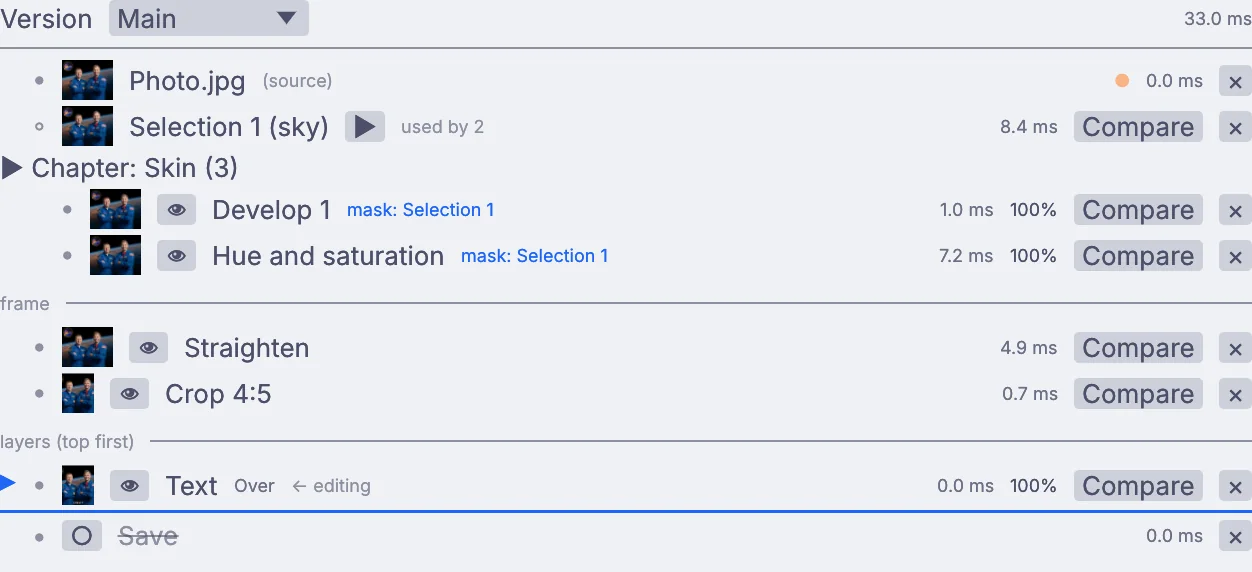
Each edit is one node in the graph, and the canvas lays them out in the same order. Click an edit to see the frame at that step and change it.

Switch an edit off with its eye, fade it with its strength, or press Compare to slide between before and after. Drag an edit to move it.

The same list follows photo edits, sound edits and the models you build in the viewport.

The Stack for an edited photo: source, a sky selection, a Skin chapter, straighten, crop, text and Save
A Stack for one photo: the sky selection, a Skin chapter, Straighten and Crop under frame, Text over it, Save at the end.
04Along the bottom

The timeline and the keyframe editor

Play, pause, scrub and loop any graph. Shape the keyframes in their own editor.

Every graph has a timeline bar: Play, Pause and Stop, a ruler to scrub, loop ranges and markers. Pause holds everything where it is, and you can scrub back through a simulation.

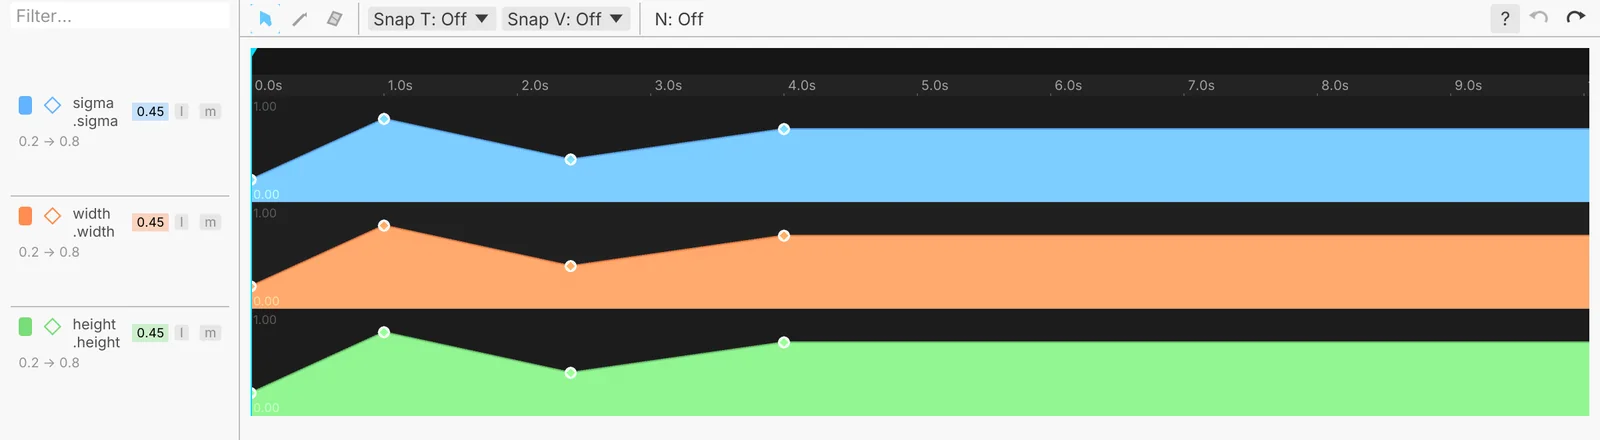
Right-click a setting and choose Animate with Keyframe. The keyframe editor opens with a lane for it.

Place keys one by one, or draw a curve freehand and let it become a few clean keys.

The timeline bar: transport buttons, Playing, the timecode and Forever 30 fpsThe keyframe editor with sigma, width and height lanes
The timeline bar, then the keyframe editor with three lanes: sigma, width and height.
05Right side

Properties

Every setting of the node you picked. Other apps call this the inspector.

Settings sit in groups, each with the right control: drag a number, pick from a list, choose a color. Hover a setting to read its help.

Right-click a setting to drive it with an expression, or choose Learn MIDI Mapping and turn a knob on your controller.

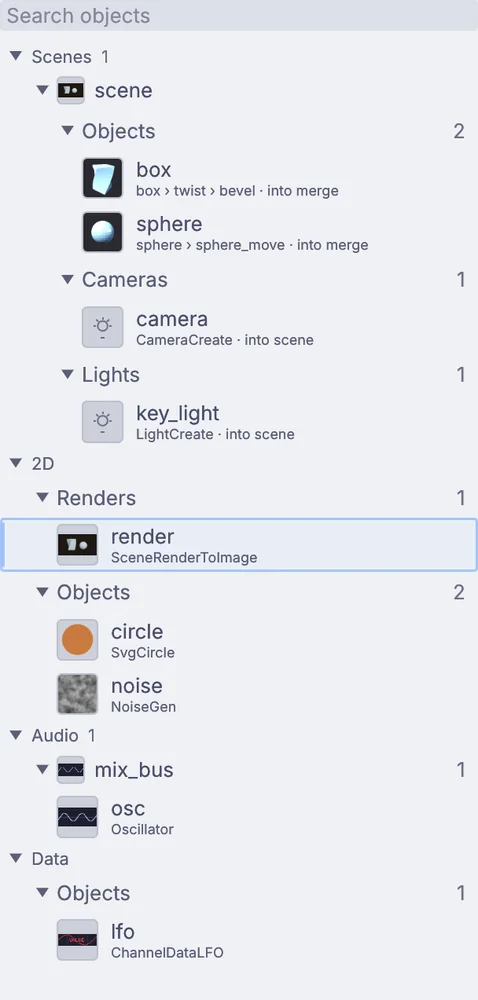
Above it, the Objects panel lists everything the graph makes, each with a small live picture.

The Objects panel listing a scene, renders, 2D objects, audio and data
Objects: a scene, its render, a circle, noise, an oscillator and an LFO.
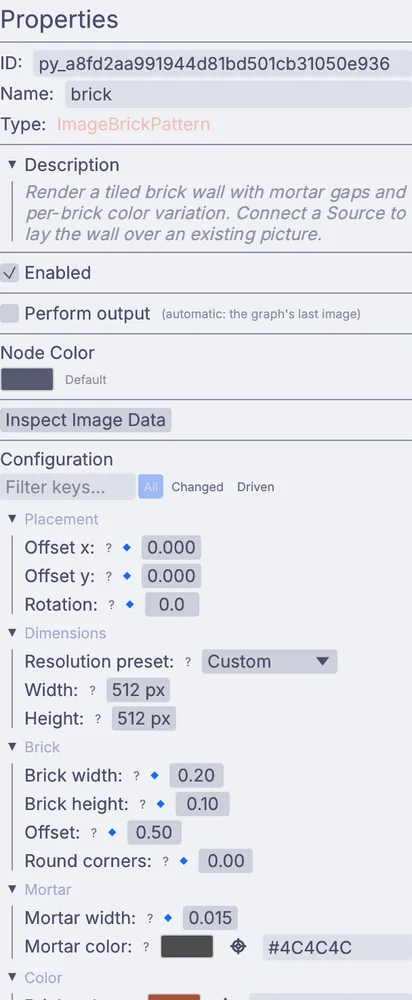
Properties for a brick pattern node, settings grouped into Placement, Dimensions, Brick and Mortar
Properties for a brick pattern, in groups.
06Window menu, and F1

Panels and Perform Mode

Arrange the window your way. Then press F1 and only the show is left.

Drag a tab to dock it somewhere new, or let go in empty space to float it. Right-click a tab to split it or swap it for another panel. Closed one by mistake? Ctrl+Z brings it back.

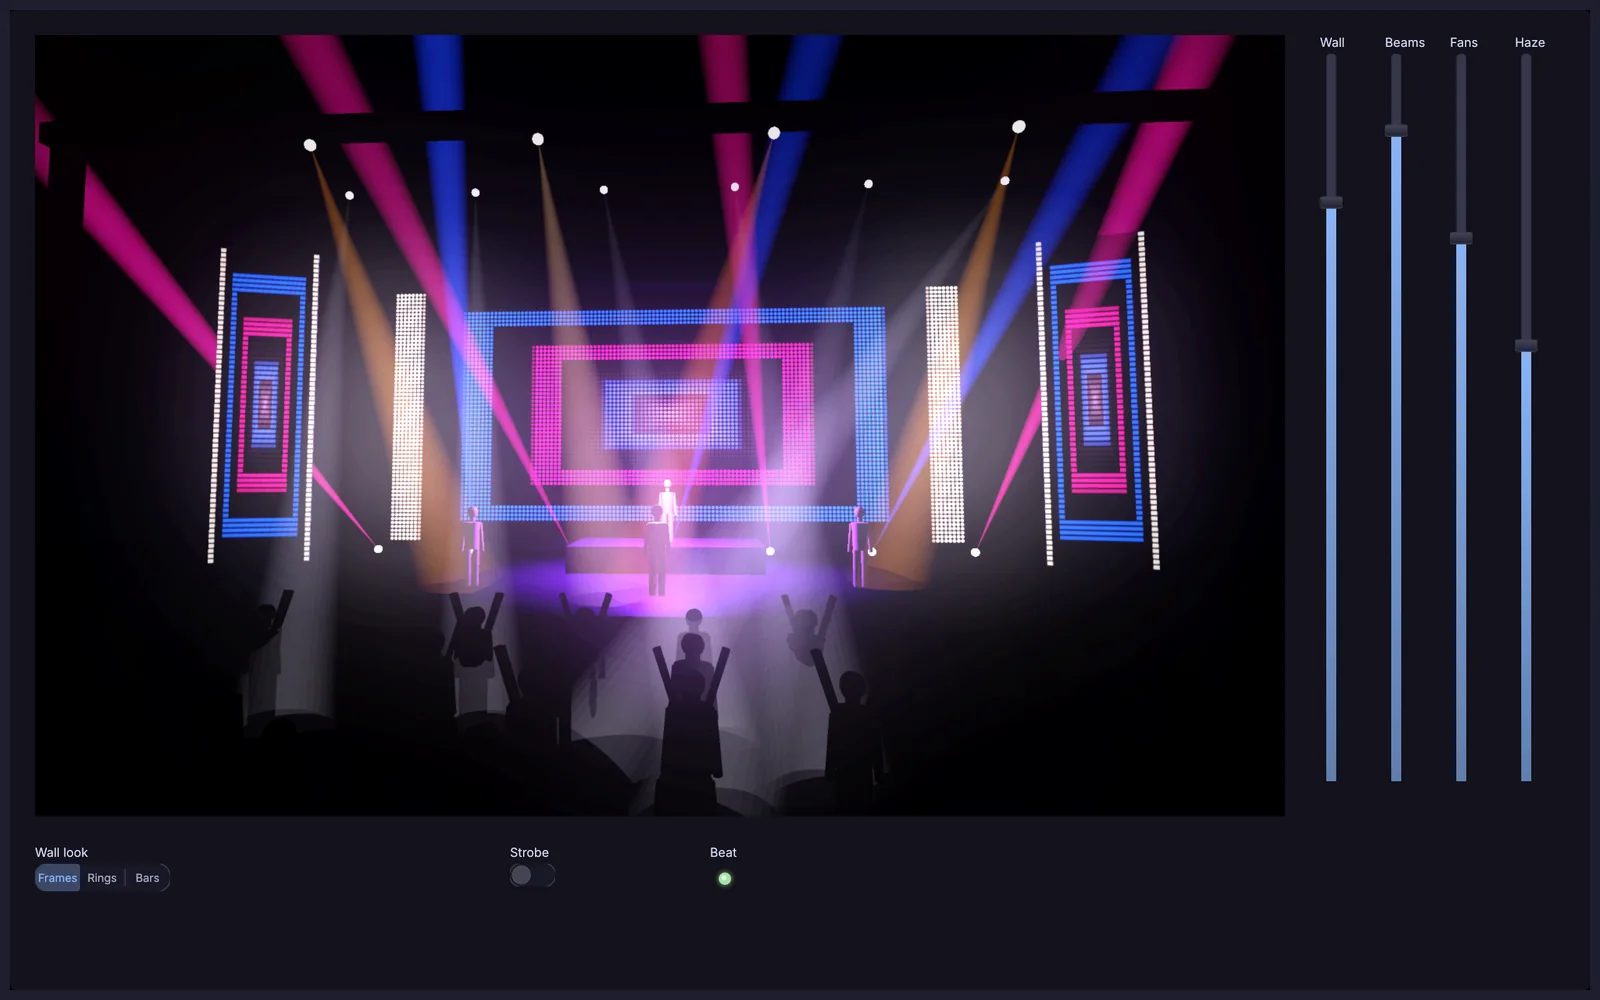
F1 takes the editor away. The window shows one thing, a picture or a control panel, and nothing restarts. Esc brings the editor back.

Right-click a node and choose Set as Perform Output to pick what the show is.

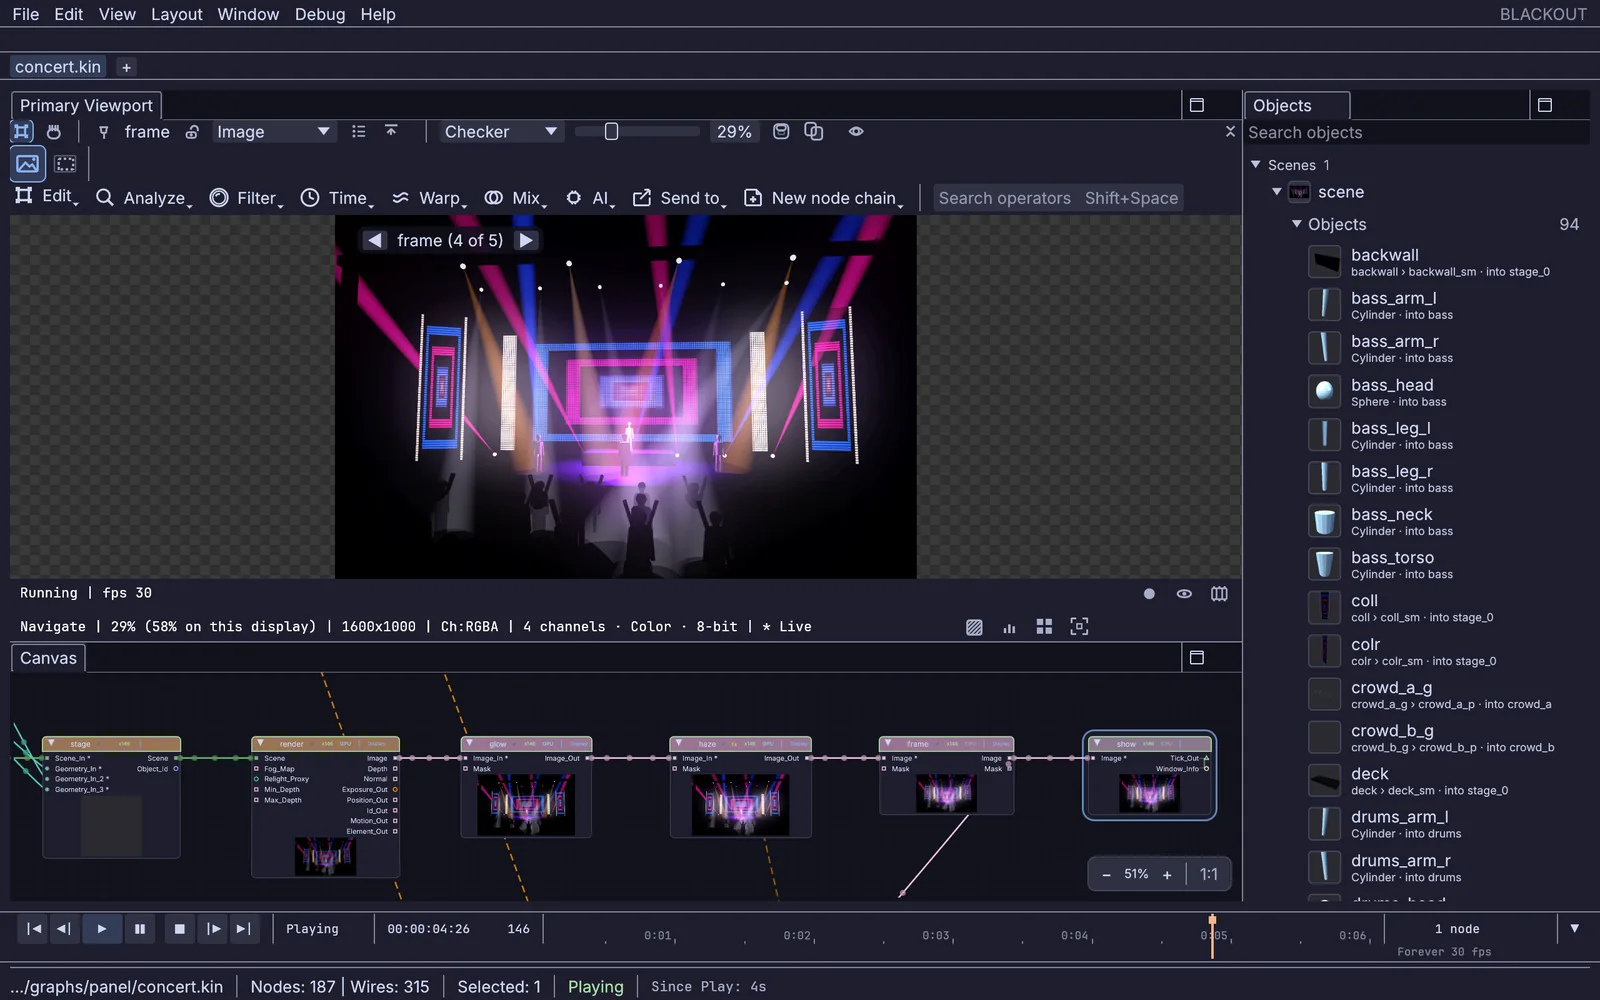
The editor: a concert stage in the viewport, its nodes on the canvas, Objects on the right
The editor: the stage in the viewport, its nodes on the canvas.
Perform Mode showing only a control panel: the stage picture, four faders, a strobe switch and the wall look
Perform Mode: the show is a control panel, so it fills the window on its own.
07Bottom panel

The Python editor and debugger

Write Python beside the graph, and step through it while it runs.

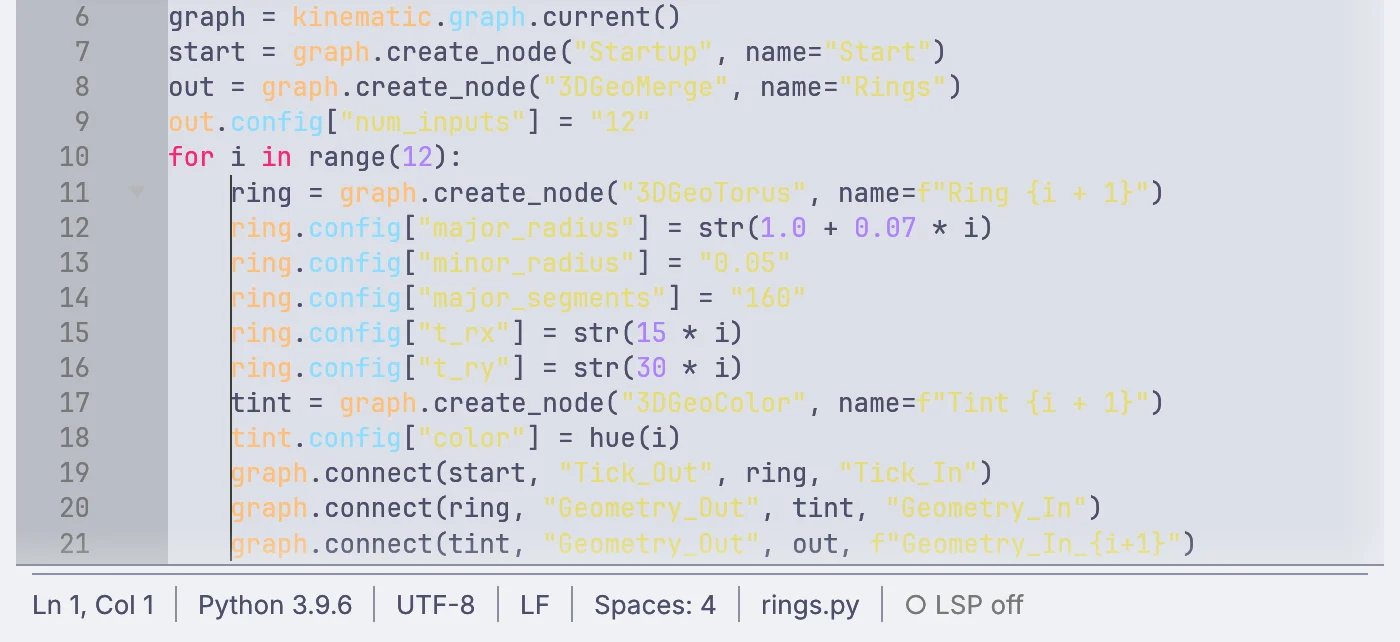
The script editor completes the kinematic module as you type, with a console for what your script prints.

Click the gutter to set a breakpoint. When the script reaches it, the graph pauses and the debugger shows the call stack and every variable.

Watch expressions update at each step. Window > Python holds the debugger, extensions and script templates.

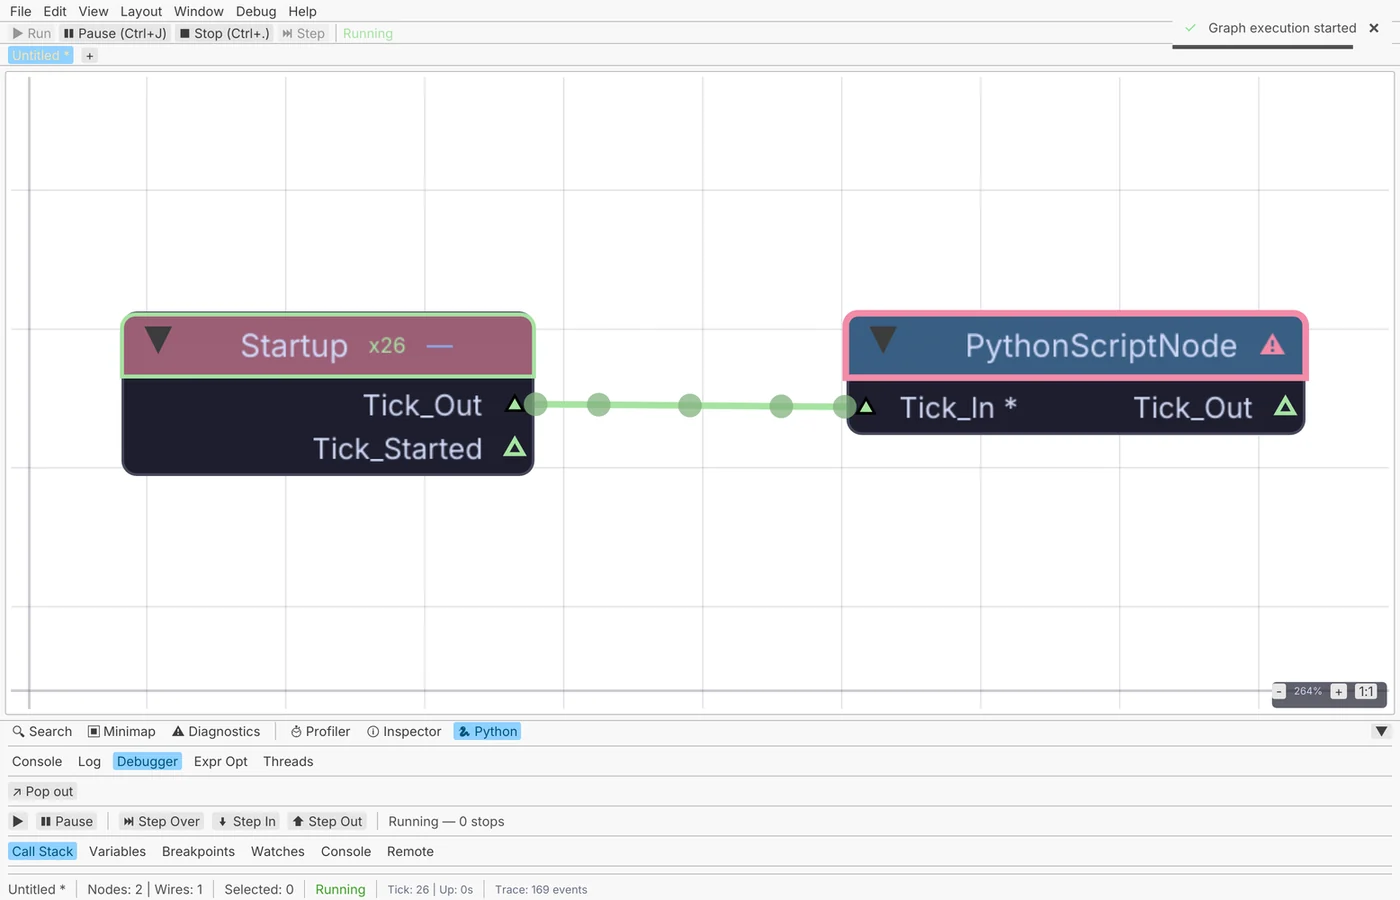
A Python script node on the canvas with the debugger open below it
The debugger under the canvas: Step Over, Step In, Step Out, Call Stack, Variables, Breakpoints.
The script editor, with a script that builds twelve rings
The script editor, with a script that builds twelve rings.
08Help menu

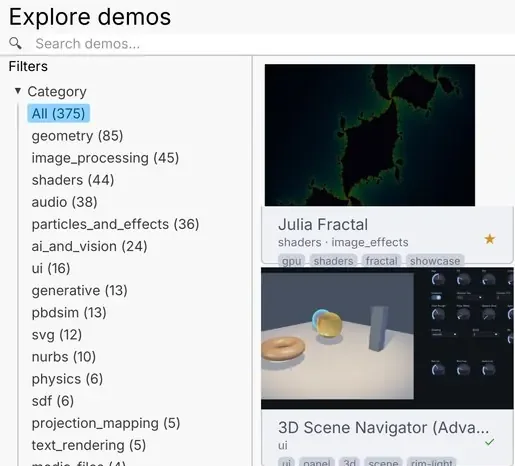
The Demos browser

Working graphs to open, take apart and keep.

Search by name, or filter by category and tag. Click a card to read what the demo does, then open it.

Every demo opens as a copy, so change anything you like. The original stays as it was.

The Welcome screen has the same shortcut: Explore demos.

09Preferences > Appearance

Themes

Four built-in themes, one light and three dark. Or mix your own.

Pick Latte, Frappe, Macchiato or Mocha. Latte, the light one, is where a new install starts. The View menu switches them too.

Edit theme opens a color editor for the interface, every port type and every node category, and the app repaints as you go. Save As Theme keeps your colors as a file you can copy to another machine.

Dim the whole interface for dark rooms works on top of any theme.

LatteLight. Where a new install starts.
FrappeDark.
MacchiatoDark.
MochaThe darkest.

The four built-in themes, drawn in their own colors: background, text and five accents.

10Preferences > Shortcuts

Hotkeys and accessibility

Change any key. Reach every part of the app without a mouse.

Preferences > Shortcuts lists every shortcut, including the ones extensions add. Click one and press the new keys. Two commands on the same keys are flagged.

Kinematic works with VoiceOver, Narrator, NVDA and Orca. Turn on High contrast, Reduce motion, port type letters or larger click targets under Preferences > Appearance > Accessibility.

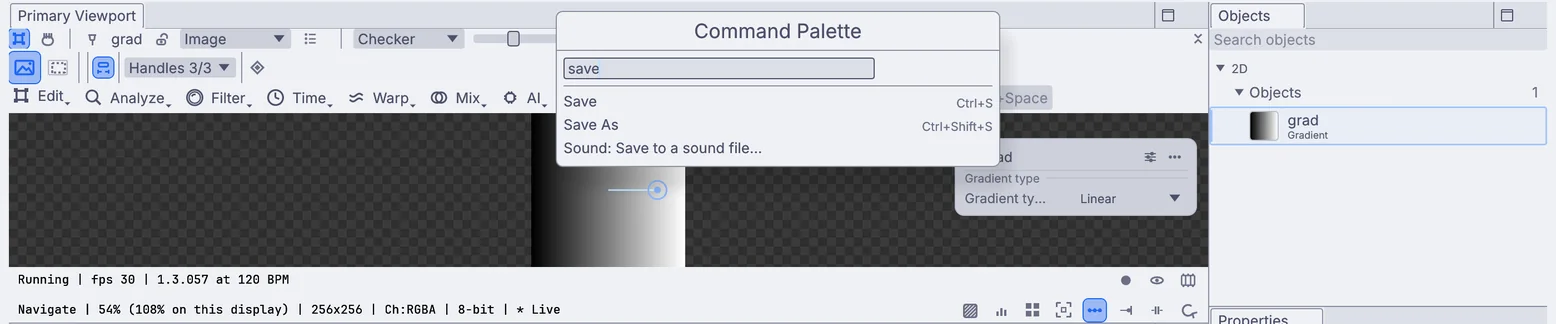
The command palette runs any command by name and shows its key.

The command palette open with save typed in, listing Save, Save As and Sound: Save to a sound file
The command palette: type a few letters, see the command and its key.
End of the tour

Where next.

Open the app and try a stop for real, or read on.

Free and open. Yours, forever.

No account, no license key. macOS, Windows, Linux and Raspberry Pi.

Download Kinematic 0.5.0