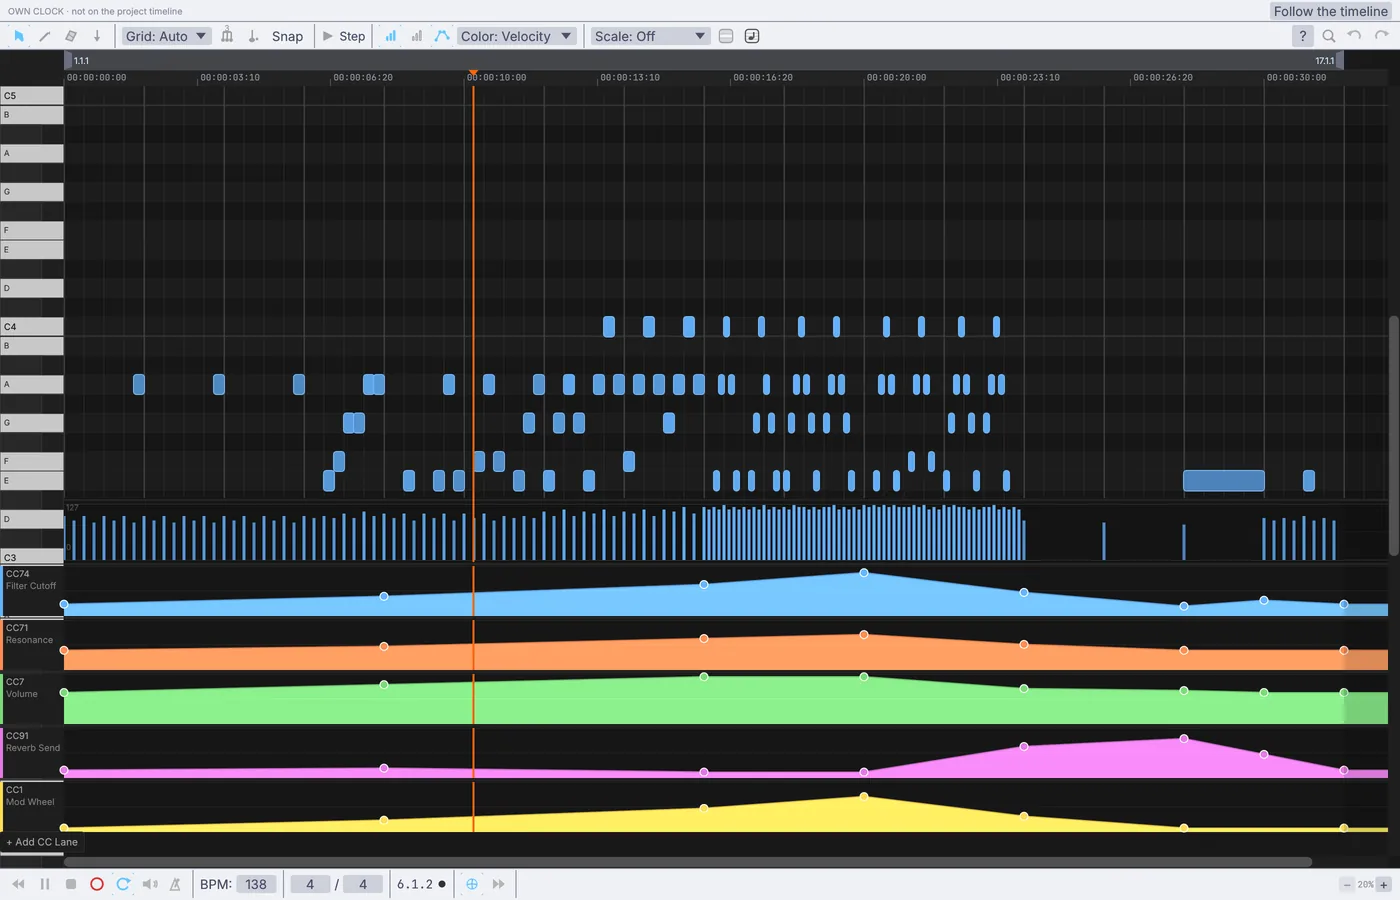
The demo already plays a synth from a looping clip. You rewrite the notes and the sweeps, and the synth plays your line.
Steps
Choose Help > Browse Demos... and open Midi Clip Synth. It plays a 16-bar loop in A minor at 138 BPM. Turn your speakers down a little first.
On the canvas, click the node named clip_player. The viewport shows its notes, and its card has Open the piano roll (E): click it, or press
E. The piano roll opens: keys on the left, notes in the middle, each note's velocity under them, and five controller lanes at the bottom.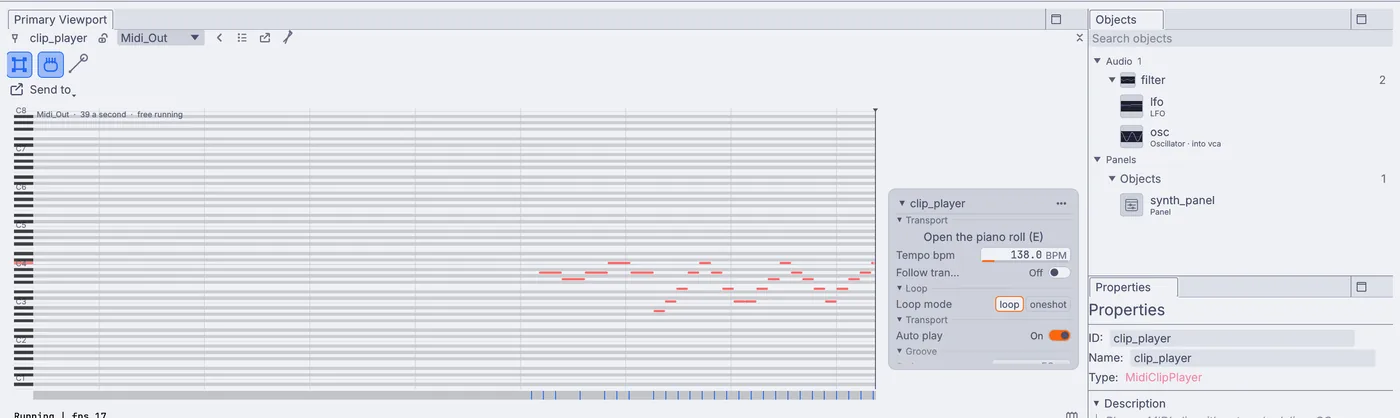
The clip player picked: its notes in the viewport, and a card with Open the piano roll (E) and Tempo bpm. Press Space to stop or play. Press
Cmd+A(Ctrl+Aon Windows and Linux) to select every note, and Delete to clear them.Draw your line. Click in the note area to add a note. Drag a note's right edge to make it longer, and drag the note up or down to change its pitch. Notes snap to the grid.
Play it in. Press
Ctrl+Kand your computer keyboard plays notes:A S D F G H J Kare white keys,W E T Y Uthe black keys, andZandXmove an octave down or up.Select some notes and press
Qto quantize them onto the beat.A filter sweep. In the CC74 Filter Cutoff lane under the notes, click points to draw the cutoff rising over the bars and falling back. Press Space to hear the synth open up.
Shape the synth. In the Objects panel, click synth_panel under Panels. The viewport shows the synth's panel: change Waveform, the Cutoff and Resonance, and the Attack, Decay, Sustain and Release of each note while it plays.
Keep your version with File > Save As....
On the canvas
The MidiClipPlayer holds your notes and sends them through MidiNoteIn and MidiToFreq to the AudioOscillator, while an AudioADSR shapes each note. The controller lanes reach the AudioLadderFilter and the effects through MidiCCIn nodes, and the knobs live on a UIPanel.
Make it yours
- Click + Add CC Lane to sweep another setting.
- Change BPM on the piano roll's bottom bar for a slower or faster loop.
- Pick a key in Scale on the toolbar so new notes stay in tune.
- Use Step on the toolbar to enter notes one at a time.