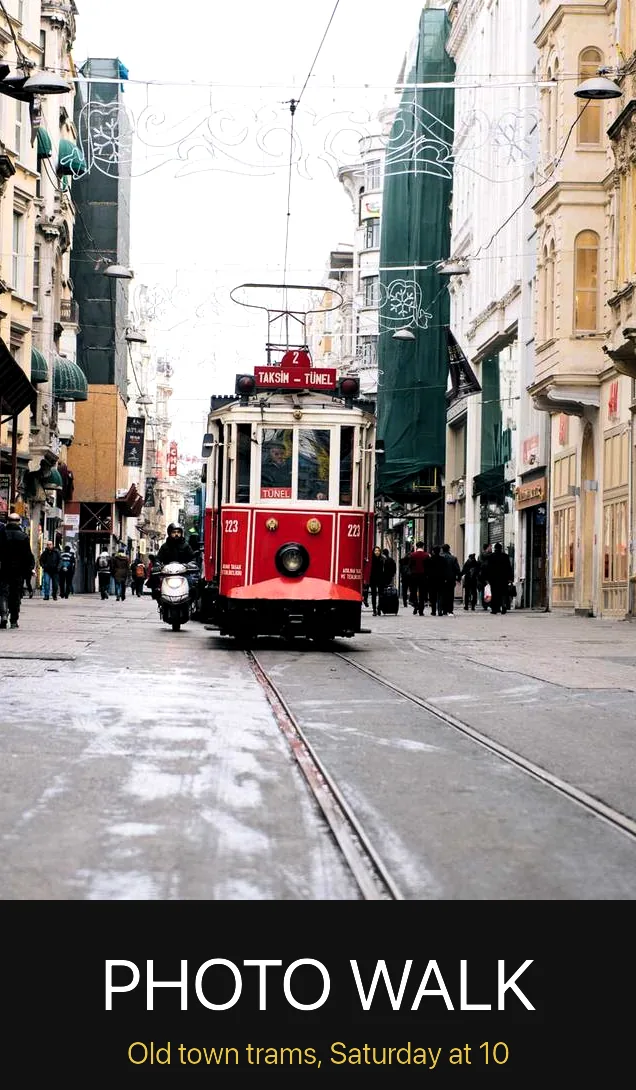
Pick a photo with a clear subject and room around it. The band at the bottom gives your words a calm place to sit.
Steps
Click New Project and drag your photo onto the viewport.
Give it some punch: choose Edit > Adjust > Tone > Develop and raise Contrast on its card, and Vibrance in the Properties panel.
Paper shape. Choose Edit > Framing > Crop and size > Crop and pick A under Aspect: the shape of A4 and A3 paper. Drag the box to frame your subject.
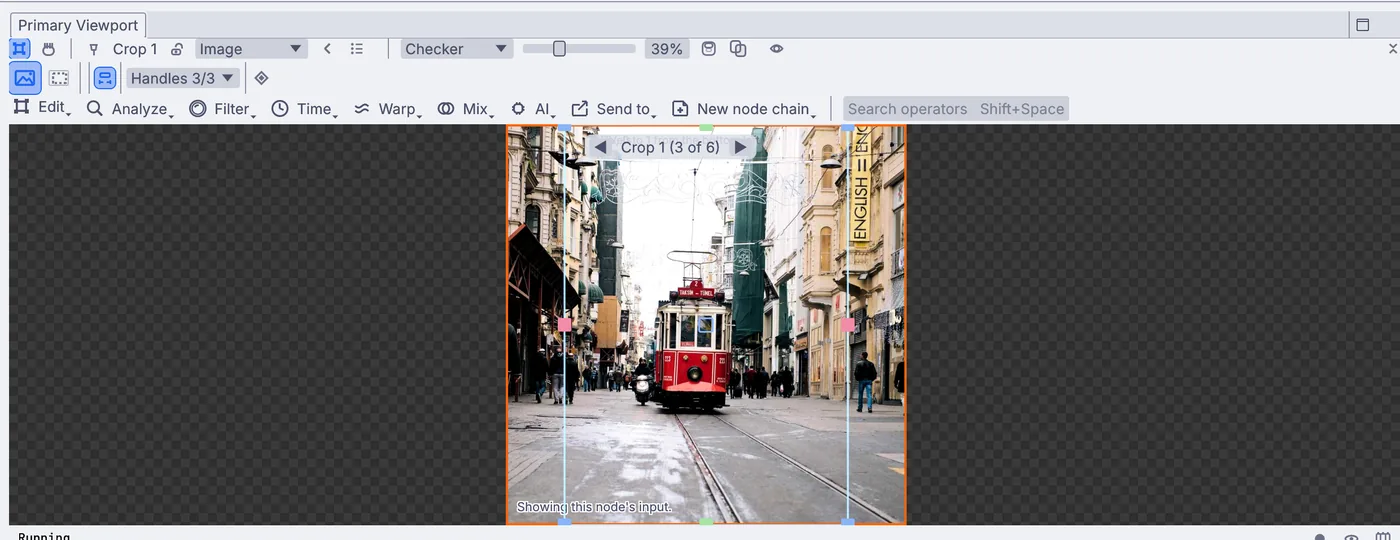
The crop box with A picked under Aspect. A band for the words. Choose Edit > Framing > Canvas > Canvas size. On its card, set Bottom to add space under the photo, about a fifth of its height, and pick a dark Color for the band.
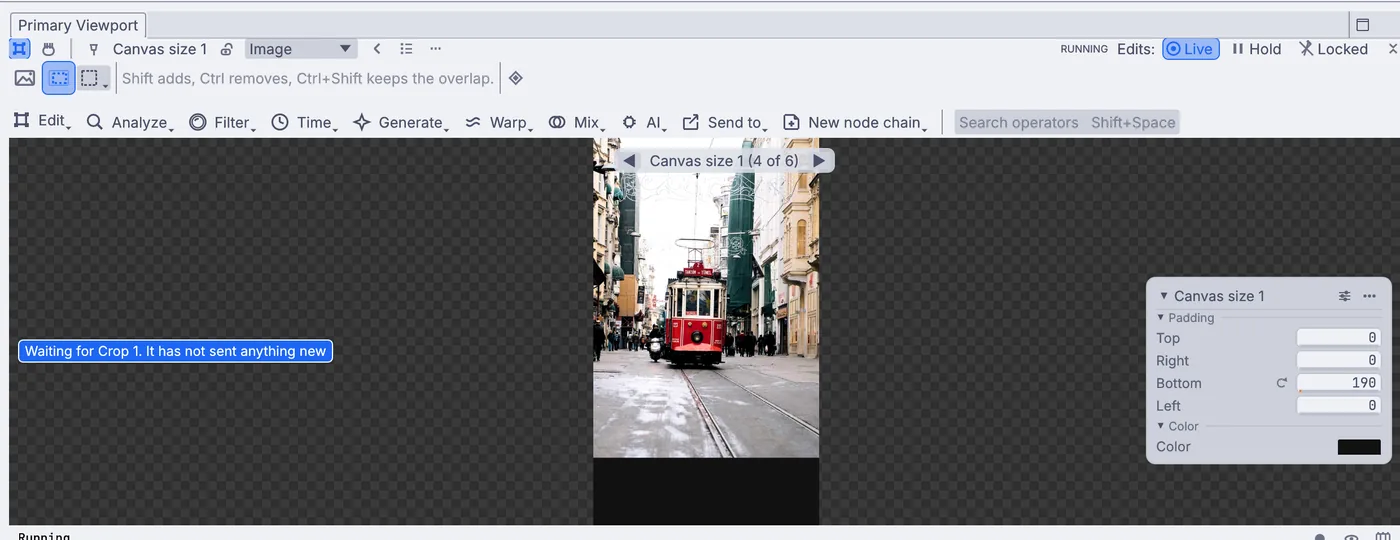
Canvas size's card: Top, Right, Bottom and Left, and the band's color. Click the dotted rectangle above the viewport's Edit menu to switch to Selection. The Layer menu appears.
The title. Choose Edit > Layer > Text > Text, click in the band and type your title. Drag the words to move them. In the Properties panel set Align to center, and change the font size and Color to suit.
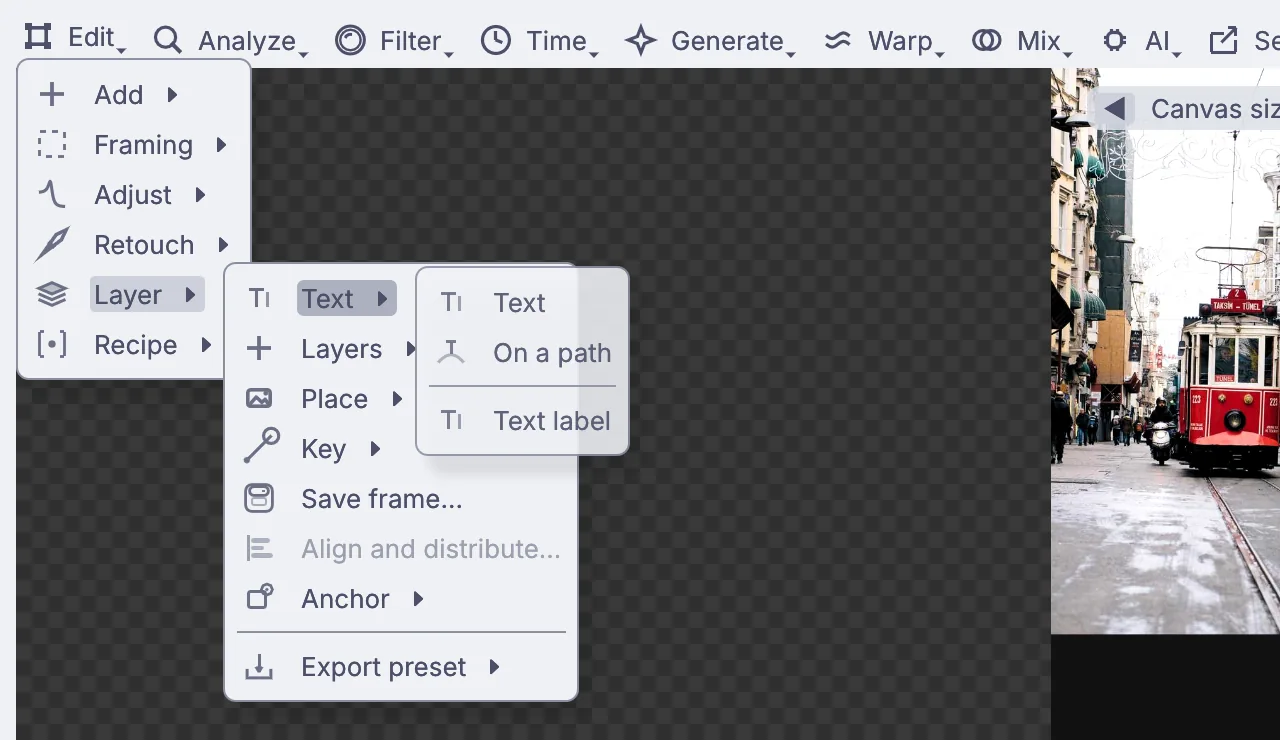
Edit > Layer > Text: Text, On a path and Text label. A second line. Add another Text the same way for the date and place, smaller and in a second color.
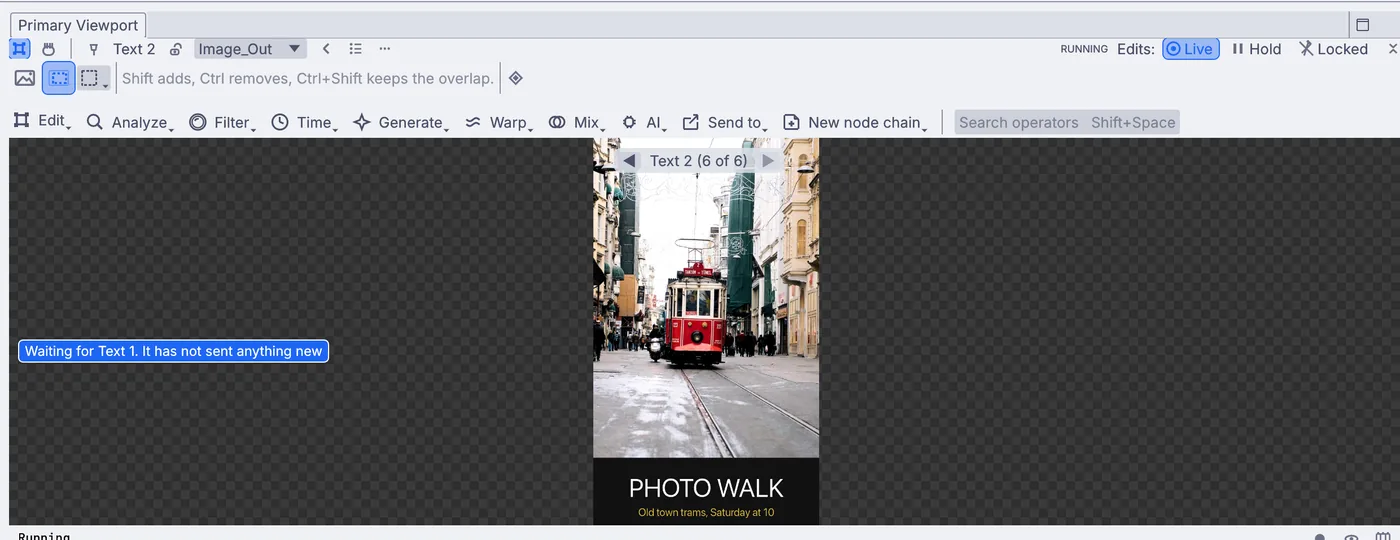
The poster in the viewport with both lines of text in the band. Save it. Choose Edit > Layer > Save frame.... For printing, Edit > Layer > Export preset > Print 300 dpi adds a print copy that is written with the same Save.
On the canvas
The crop is ImageCrop, the band is ImagePad, and each line of text is a TextRenderOverImage node after them. Text always comes after the crop and the band, so cropping again later never moves your words off the poster.
Make it yours
- Use Edit > Layer > Text > On a path for a curved headline.
- Place a logo with Edit > Layer > Place > On top....
- Turn View > Rulers on and drag guides out of the rulers to line things up.
- Make a square version for social posts by right-clicking an edit in the Stack and choosing New version from here, and crop it to 1:1.