
A projector that is not straight in front of the wall throws a slanted shape. Keystone bends the picture the other way, so it lands square.
Steps
On the start screen, click New Project. Drag a picture or a video onto the viewport, where the card says Drop a file here. It fills the viewport.
Hook the projector up as a second screen and aim it at the wall.
Along the top of the viewport, open Edit, point at Framing, then Move and reshape, and choose Keystone. A handle appears on each corner of the picture.
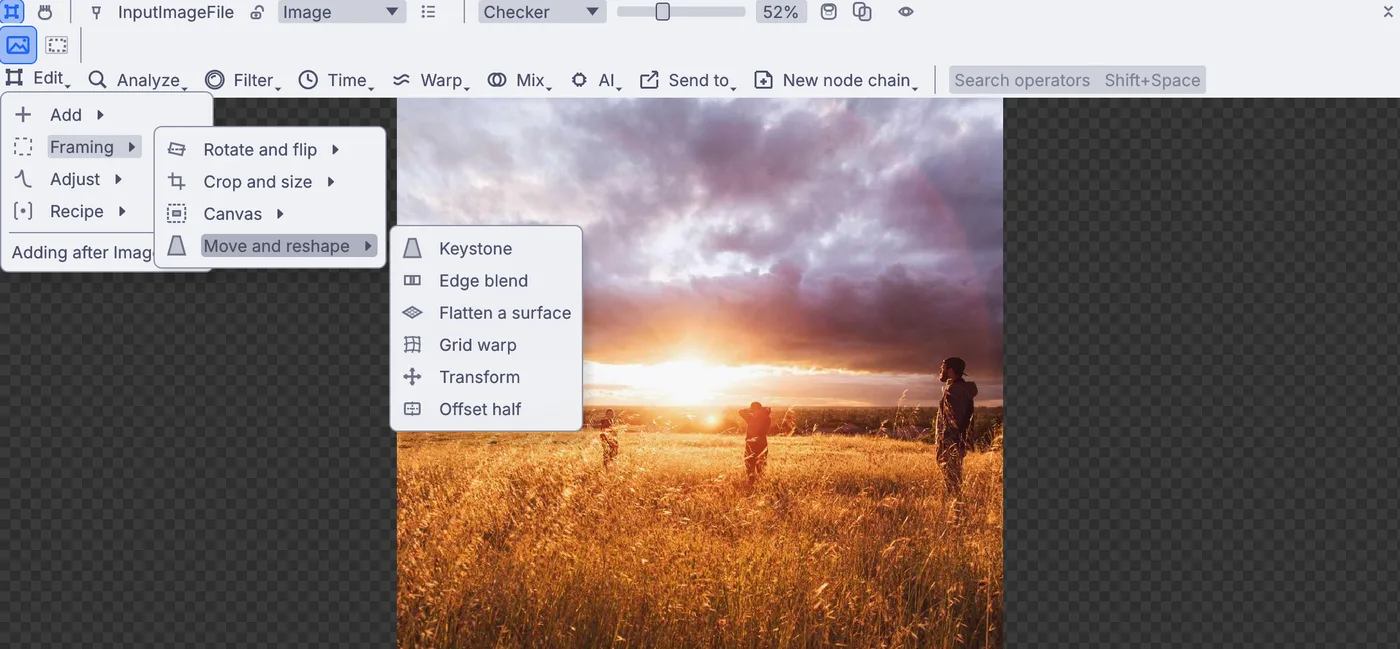
The Edit menu open on a photo: Framing, then Move and reshape, with Keystone, Edge blend, Flatten a surface, Grid warp, Transform and Offset half. Choose Window > Outputs... and pick the projector under Display in the perform window settings.
Press
F1. The picture fills the projector and lands slanted on the wall. See which corners are off, then pressEscto come back to the editor.Drag each corner handle the way that corner has to move on the wall. Click a corner and nudge it with the arrow keys for the last few pixels.
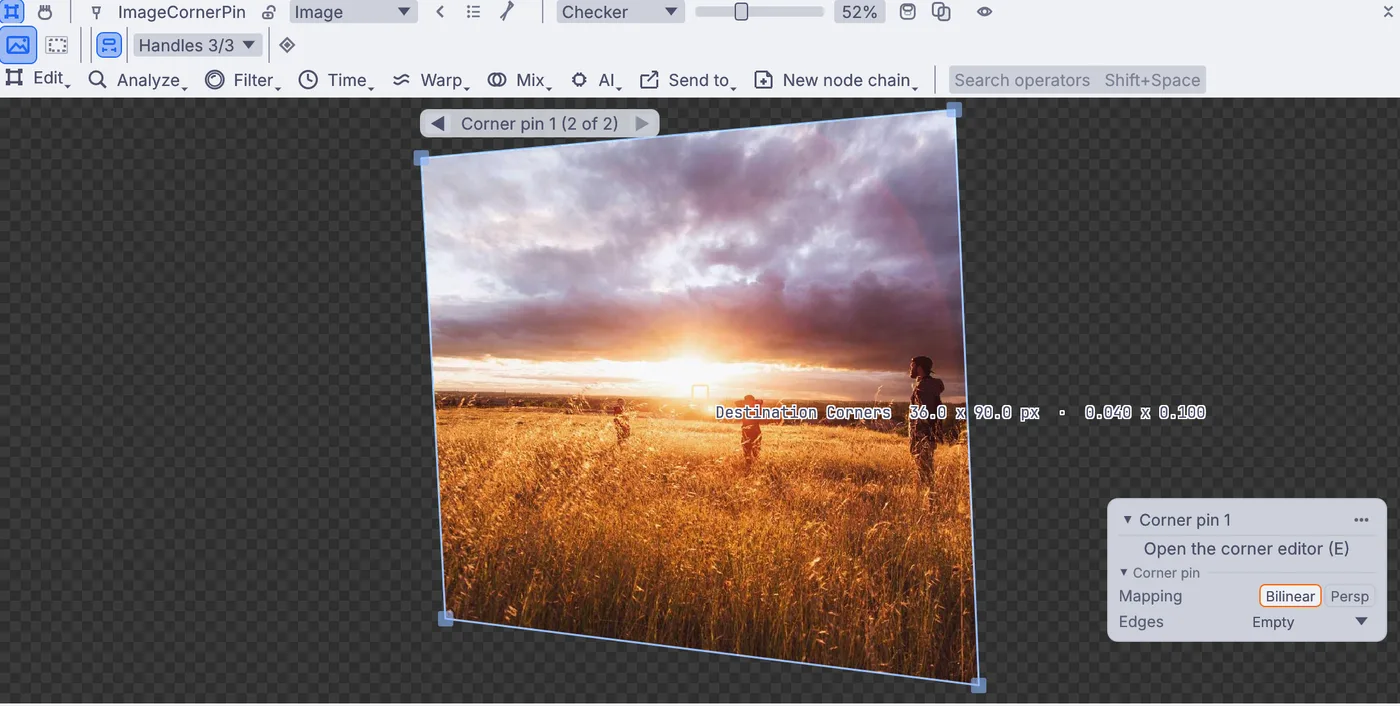
The photo with its four corners dragged in, slanted so it will land square on a wall seen from the side. Press
F1to check, andEscto adjust again, until all four corners sit on the corners of the wall.
On the canvas
Dropping the file added an InputImageFile (or an InputVideoFile for a video), and Keystone added an ImageCornerPin after it. The corner positions you dragged are its settings.
Make it yours
- Drop a video instead of a picture. The corners stay where you put them while it plays.
- Pick Edge blend from the same Move and reshape menu when two projectors overlap on one wall, so the seam fades out.
- Pick Grid warp from that menu for a curved surface such as a column.
- Save the file: the corners are saved with it, so the next show starts lined up.